
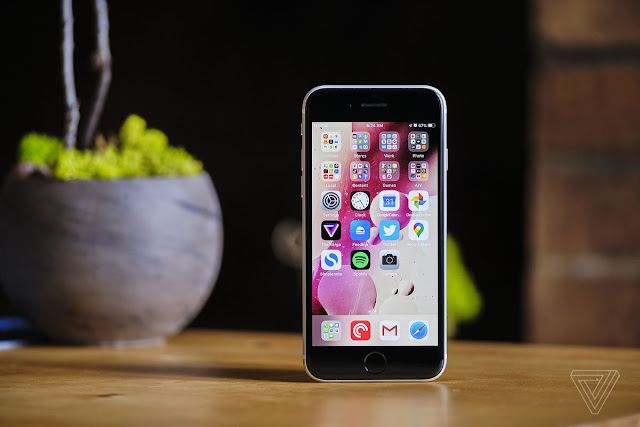
In the past, transferring photos from an iPhone to a Windows-based PC proved to be a real pain. These days, whoever wants to transfer photos from the iPhone to the PC has several options. It is no longer necessary to download iTunes for Windows, which is a welcome addition. Also, an iCloud subscription is not considered compulsory, but another possible option.
How do I transfer photos from the iPhone to the PC?
If you want to save your iPhone photos or simply browse through the photo albums on a larger screen, you can transfer pictures from your iPhone to your Windows-powered PC. In the past, this was done most easily with iTunes for Windows. While Apple's media center is discontinued for Mac since the end of 2019, Windows users are still able to use iTunes to synchronize their content.
1. Transfer iPhone photos to PC using Windows Explorer
Any iPhone can be connected to a Windows-based PC like a USB device. From there, the photo files can be easily displayed and downloaded. This is how it works:
Step 1:
Connect your iPhone to the PC via a USB cable, where the iPhone will then display the message "Trust this computer?" Go ahead and confirm this message followed by performing a two-factor authentication if necessary. The iPhone now appears like a USB flash drive in Windows Explorer:

Step 2:
To transfer the images from the iPhone to the PC via Windows Explorer, you can either directly select the drop-down menu (in the left bar) or (double) click on the iPhone in Windows Explorer in order to open the file structure in main window:
Step 3:
Another click will reveal the DCIM folder on the iPhone. This folder contains photos taken with the device or, for example, pictures backed up from Whats App:
Step 4:
As you can see in the example below, there are now more folders to deal with. Depending on how many folders have been created on the iPhone, all of the available images are already sorted. From here, you are able to select whole folders or single photos and either copy and paste them to your computer or right-click and select "Copy to PC".
2. Transfer photos to your Windows PC via iCloud
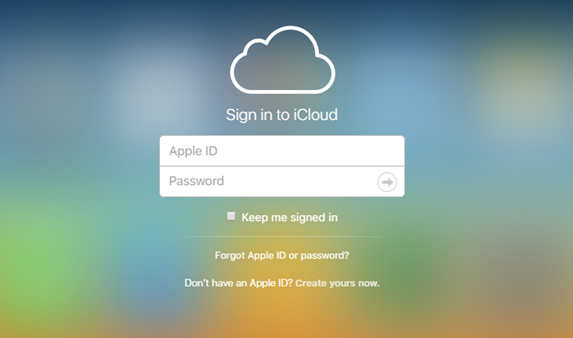
Step 2:
If you have two-factor authentication enabled, you need to use another Apple device to generate the required code at this point. After that, familiar Apple icons will appear in the browser. The photos are located in the folder with the familiar icon:
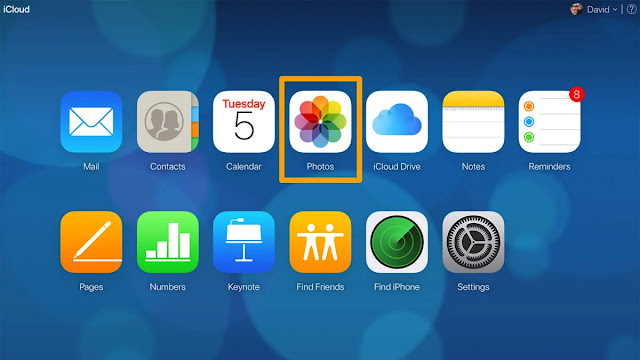
Step 3:
By clicking on the photo app in the browser, the images can be transferred from the iPhone to the PC. In addition, recently deleted items and favourites can also be displayed. Photo folders can also be quickly found and downloaded from the drop-down menu on the left.
3. View and download iPhone photos via an app in your browser
Did you know that there is an app in the Apple App Store that allows you to access your photos simply by accessing your browser and typing in the server address? The free app known as "WIFIAlbumFree" makes it possible. It works like this:
Step 1:
Download the free app WIFIAlbumFree from the Apple App Store. Ensure that the iPhone and PC are connected to the same WiFi network. Now open the iPhone app and your smartphone becomes a web server:
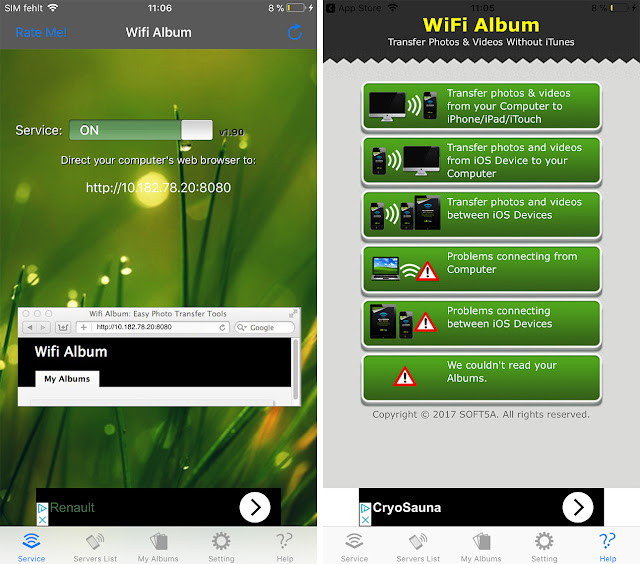
Step 2:
Open a browser of your choice, for example Firefox or Chrome, and enter the IP address in the URL field as shown. Now all photos and folders on your iPhone will be displayed in the browser and you can browse through the folders and download the images individually or collectively.